 how-to
How to Restore Movement Patterns: A 2026 Guide
Table of Contents
- Why Faulty Movement Patterns Cause Recurring Pain
- Functional Movement Assessment Benefits: Finding the Root Cause
- Step 1: How to Screen Your Own Movement at Home
- Step 2: Corrective Exercises for Movement Dysfunction
- Step 3: How to Fix Rounded Shoulders From Desk Work
- The Role of Neuromuscular Re-Education and Motor Control
- How Long Does It Take to Retrain Movement Patterns?
- Conclusion: Start Restoring Your Movement Today
- Frequently Asked Questions
Last Updated: September 9, 2026
Why Faulty Movement Patterns Cause Recurring Pain
Most people treat recurring back or neck pain as a structural problem when it is actually a movement problem. A faulty movement pattern is a learned motor habit, often developed after an injury or years of desk work, where your body recruits the wrong muscles to perform a task. Over time, these compensatory patterns overload joints and soft tissues, which is why the same pain keeps returning despite rest, stretching, or generic exercise.
Pain often persists because your central nervous system has locked in an inefficient way of moving. Your brain defaults to the path of least resistance, even when that path stresses your spine. At Spinal Haven, we focus on how to restore movement patterns rather than simply chasing symptoms, because addressing the underlying motor control issue can help prevent the cycle of recurrence.
Functional Movement Assessment Benefits: Finding the Root Cause
A functional movement assessment is a systematic evaluation of how your body moves through fundamental patterns, not just how strong or flexible you are. The primary benefit is identifying where compensations occur along your kinetic chain, revealing the true source of dysfunction that may be presenting as pain elsewhere.
This approach contrasts with standard examinations that check range of motion while you lie on a table. By isolating where a pattern breaks down, a clinician can determine whether the limitation stems from joint mobility, muscle activation, or a central nervous system processing issue. This precision allows treatment to target the cause rather than guessing at the symptom.
Step 1: How to Screen Your Own Movement at Home
Before you can fix a movement pattern, you need to identify it. A simple home screening process uses bodyweight exercises to reveal asymmetries and compensations.
- Overhead squat test: Stand with feet shoulder-width apart and arms overhead. Perform a slow squat. Watch in a mirror for your heels lifting, knees caving inward, or your lower back rounding.
- Single-leg stance: Stand on one leg for 30 seconds. Excessive wobbling or hip dropping indicates stability and motor control deficits.
- Active straight leg raise: Lie on your back and lift one leg with a straight knee. Compare the range between sides; a significant difference suggests mobility restrictions.
These tests provide visual feedback on your baseline. Record them on video if possible, as reviewing footage often reveals asymmetries you cannot feel. If a movement is painful, stop immediately and consult a qualified professional. This self-assessment is a starting point for awareness, not a diagnosis.
Step 2: Corrective Exercises for Movement Dysfunction
Corrective exercises for movement dysfunction are not a random collection of stretches and strengthening moves. They are a systematic retraining of the brain-body connection, designed to break a faulty motor pattern into its components and rebuild it with precise, repeatable form. You can perform a meaningful version of this process at home if you follow a structured progression and use video feedback to replace the therapist's eyes.
The Standard Progression: Mobility → Stability → Strength → Speed
Most practitioners agree on a four-stage progression. Skipping a stage is the most common reason corrective exercise fails.
- Mobility: If a joint cannot move through its full available range, no amount of strengthening will fix the pattern. For example, if your overhead squat shows your heels lifting, you likely have an ankle dorsiflexion restriction. A simple fix is the half-kneeling ankle mobilization: kneel on one knee, keep your front heel flat, and drive your front knee forward over your toes for 10 slow reps per side. Hold the end position for 2 seconds.
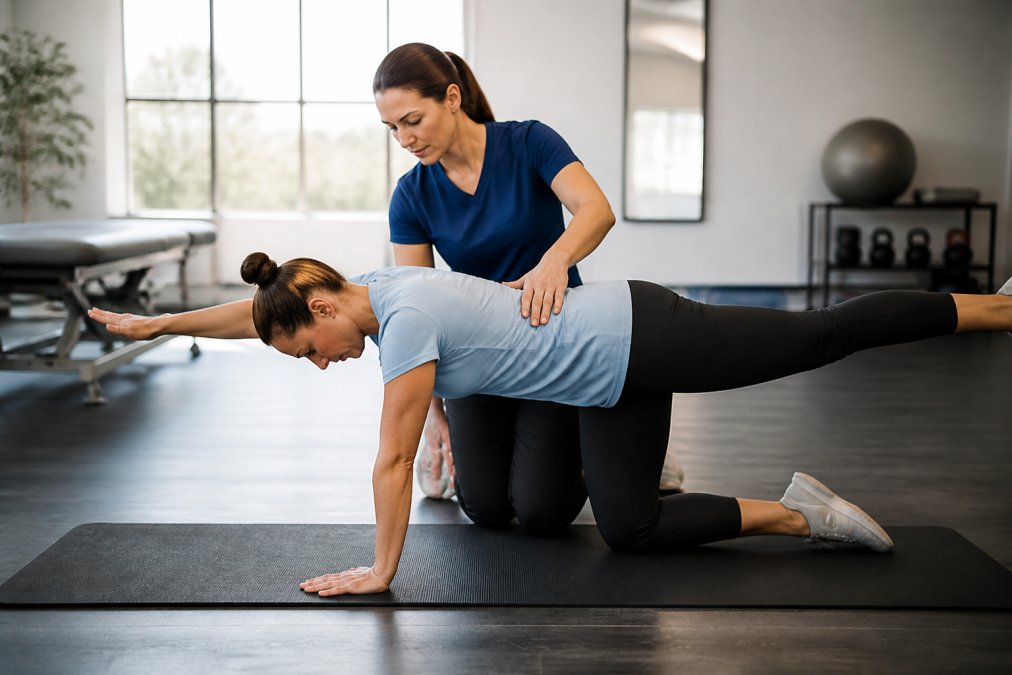
- Stability: Once mobility is restored, you must be able to hold the joint in a neutral position under load. The bird-dog exercise is a standard here. The key is not the movement itself but the absence of spinal rotation or hip hiking. Perform 3 sets of 8 slow reps per side, with a 3-second pause at full extension.
- Strength: Now you load the corrected pattern. If your squat showed knees caving inward, you would not add weight yet. Instead, perform a goblet squat with a light dumbbell held at your chest, focusing on driving your knees out over your toes. Use a weight that allows 3 sets of 10 perfect reps. If form breaks, reduce the weight.
- Speed and Load: Finally, you integrate the pattern under realistic demands. This is where the bridge to strength training happens. For a lifter, this means progressing from a goblet squat to a barbell back squat, but only after the goblet squat is flawless at a challenging weight. For a runner, it means progressing from a bodyweight lunge to a walking lunge to a split squat, then to running drills.
Self-Correction Cues That Work
Because you cannot see your own movement in real time, you need external cues. The most effective tool is a smartphone camera. Record a single set of your corrective exercise, then compare it frame-by-frame against a reference video of the same movement. Look for three common faults:
- Knee valgus (knees caving inward): Place a resistance band around your knees during a squat. The band provides tactile feedback, if your knees cave, the band goes slack. Push out against the band for every rep.
- Lumbar flexion (lower back rounding): Place one hand on your lower back and one on your stomach. You should feel both hands move together as one unit. If your lower back hand moves first, you are rounding.
- Excessive forward lean: Perform the squat facing a wall, standing about 6 inches away. If your knees touch the wall before you reach parallel, your ankle mobility is the limiting factor.
The Role of Load and Repetition
Motor learning research suggests that a new pattern requires hundreds of repetitions to become automatic, but the quality of each rep matters more than the count (peer-reviewed research). A common prescription is 3 sets of 10 reps, performed daily, for two to four weeks before reassessing (PubMed). If you are also strength training, perform your corrective exercises as part of your warm-up to prime the nervous system and ensure the new pattern carries over into your working sets.
When to Progress vs. When to Regress
A common mistake is progressing too quickly. Use this simple rule: if you cannot perform 3 sets of 10 reps with perfect form, regress the exercise. For example, if a full squat shows knee valgus, drop to a box squat where you control the descent to a box at parallel. If that still shows valgus, perform a wall sit with a band around your knees. Regression is not failure; it is the fastest path to a durable correction.
Step 3: How to Fix Rounded Shoulders From Desk Work
Rounded shoulders from desk work are not just a postural habit, they are a neuromuscular adaptation. Prolonged sitting in a flexed position shortens the pectoralis minor and the anterior deltoid, while inhibiting the lower trapezius, rhomboids, and serratus anterior (peer-reviewed research). Your brain accepts this shortened position as the new neutral, which is why simply "standing up straight" feels unnatural. Fixing this requires a three-part approach: release the tight tissue, activate the inhibited muscles, and retrain your brain's perception of neutral shoulder position.
Step 3A: The Doorway Stretch, Done Correctly
The standard doorway stretch is often performed incorrectly, which is why it does not work. Most people stretch the front of the shoulder but fail to target the pectoralis minor, which is the primary driver of rounded shoulders. To target it specifically:
- Stand in a doorway with your elbow bent to 90 degrees and your forearm resting on the doorframe.
- Keep your elbow at shoulder height or slightly below, raising it too high shifts the stretch to the upper chest.
- Gently step forward through the doorway until you feel a stretch in the front of your chest, near your armpit.
- Hold for 30 seconds, then relax for 15 seconds. Repeat 3 times per side.
A more effective alternative is the supine pec stretch with a foam roller: lie on a foam roller placed along your spine, with your arms out to the sides in a T position. Let gravity do the work for 2 minutes. This position also opens the thoracic spine, which is often stiff in desk workers.
Step 3B: Activate the Inhibited Muscles, The Y-T-W Sequence
The prone Y-T-W sequence is the gold standard for activating the lower trapezius and rhomboids. But the key is in the details:
- Y position: Lie face down on a mat, arms overhead in a Y shape, thumbs pointing up. Lift your arms 2-3 inches off the floor by squeezing your shoulder blades down and together. Hold for 3 seconds. Perform 8 reps.
- T position: Arms out to the sides in a T, thumbs up. Lift and hold. Perform 8 reps.
- W position: Elbows bent to 90 degrees, arms forming a W. Squeeze your shoulder blades together and lift your elbows off the floor. Hold for 3 seconds. Perform 8 reps.
Perform this sequence daily. The goal is not fatigue but precise activation. If you feel your neck or upper traps working instead of your mid-back, reduce the range of motion or use a lighter effort.
Step 3C: Retrain Neutral Shoulder Position, The Wall Slide
The wall slide is the single most effective exercise for teaching your brain where neutral shoulder position actually is. Here is the precise protocol:
- Stand with your back against a wall, feet about 6 inches from the baseboard.
- Press your lower back, upper back, and head against the wall. Do not arch your lower back, keep a slight natural curve.
- Place your arms against the wall in a goalpost position (elbows bent to 90 degrees, upper arms parallel to the floor).
- Slowly slide your arms overhead, keeping your wrists, elbows, and hands in contact with the wall. Stop when your arms are fully extended or when your lower back starts to arch off the wall.
- Hold the top position for 3 seconds, then slowly lower back to the goalpost position.
Perform 3 sets of 8 slow reps. The wall provides immediate visual and tactile feedback, if your arms lose contact, you are compensating with your lower back or neck. This exercise is not about strength; it is about motor control.
The Psychological Barrier: Kinesiophobia and Posture Anxiety
A rarely discussed factor in fixing rounded shoulders is kinesiophobia, the fear that any deviation from "perfect" posture is harmful. This leads to bracing, breath-holding, and over-correction, creating new tension patterns. The research is clear: posture is not static, and the spine is designed to move. The goal is not rigid military posture but the capacity to move in and out of neutral positions comfortably.
A practical way to address this is the "posture reset" habit: every 20 minutes of desk work, perform a 10-second reset. Stand up, roll your shoulders back and down, take a deep breath, and perform 3 slow wall slides. This is not about perfection, it is about breaking the prolonged static position that reinforces the faulty pattern.
Ergonomics: The Missing Link
No amount of exercise will fix rounded shoulders if your workstation is still forcing you into the same position for 8 hours a day. General ergonomic guidelines suggest a simple setup:
- Monitor height: The top of your screen should be at or slightly below eye level. If you are looking down, your head is forward.
- Chair armrests: Adjust so your elbows rest at 90 degrees, with your shoulders relaxed, not elevated.
- Keyboard position: Your wrists should be straight, not bent up or down.
Measuring Progress
To track your progress objectively, use the wall test: stand with your back against a wall and try to touch the back of your head to the wall without lifting your chin. If you cannot, your upper cervical spine is stiff. A second test is the scapular squeeze: stand with your arms at your sides, squeeze your shoulder blades together, and measure the distance between your thumbs and your thighs. As your posture improves, your thumbs should move further back. Record both tests on video weekly to see tangible progress.
Consistency is the deciding factor. Performing this 10-minute routine daily outweighs an hour-long session once per week when the goal is to restore movement patterns affected by chronic posture. Expect noticeable changes in two to four weeks, but understand that the old pattern remains dormant and can resurface under stress or fatigue, which is why the daily reset habit is non-negotiable.
The Role of Neuromuscular Re-Education and Motor Control
Neuromuscular re-education is the therapeutic process of retraining the brain to coordinate muscle activity correctly, restoring efficient and pain-free movement. It sits at the heart of any successful effort to restore movement patterns because it directly addresses the motor control deficit that created the dysfunction.
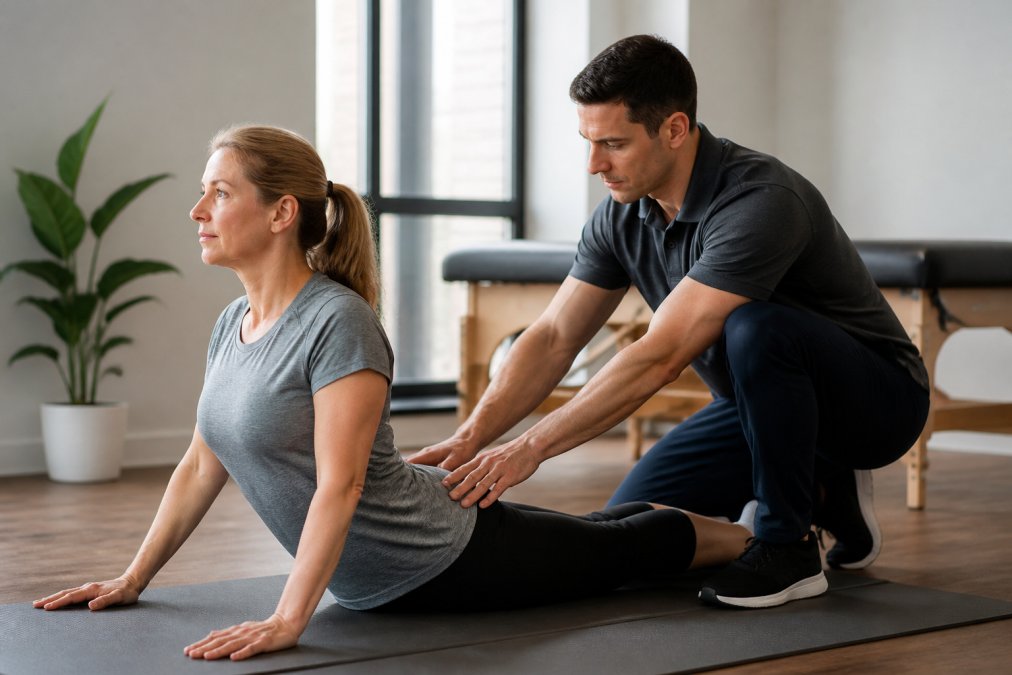
Therapeutic modalities like manual therapy can prepare the tissue, but lasting change requires motor learning. This process relies heavily on tactile feedback from a clinician and visual feedback from mirrors or video. A skilled therapist guides you through the correct pattern, providing hands-on cues until your body internalizes the movement without conscious effort.
This is where specialized training becomes invaluable. Clinicians certified in methods like the McKenzie Method® and the Selective Functional Movement Assessment (SFMA) are equipped to diagnose the specific direction and nature of the dysfunction. They do not just tell you to "engage your core"; they identify why your core is not engaging and systematically retrain that neuromuscular pathway.
How Long Does It Take to Retrain Movement Patterns?
Retraining a faulty movement pattern typically takes several weeks of consistent, focused practice, though the timeline varies based on the complexity of the dysfunction and your consistency. A general rule is that the longer you have moved a certain way, the longer it takes to change it.
Most people notice initial changes in two to four weeks of daily corrective work. However, the old pattern remains dormant and can resurface under fatigue or stress. This is why a rehabilitation protocol must include a plan for integrating the new pattern into your regular activities and strength training.
| Factor | Impact on Timeline | What It Means For You |
|---|---|---|
| Consistency | High | Daily practice beats weekly marathon sessions |
| Dysfunction age | High | Chronic years-long patterns take longer to change |
| Feedback quality | Medium | Professional cues accelerate motor learning |
| Stress and fatigue | Medium | Old patterns return when the nervous system is taxed |
Patience is essential. If you have spent years moving with a compensatory pattern, expecting a permanent fix in a week sets you up for frustration.
Conclusion: Start Restoring Your Movement Today
The path to resolving recurring pain begins with a single honest look at how you move. Generic stretching and strengthening often fail because they reinforce the faulty pattern rather than correcting it. The most effective strategy involves a thorough functional assessment, targeted corrective exercises, and consistent neuromuscular retraining.
At Spinal Haven, our one-on-one, movement-based approach is designed to identify the root cause of your limitation and equip you with long-term self-management strategies. Led by a clinician certified in the McKenzie Method® and trained in the SFMA, we help you restore strength, understand what influences your symptoms, and return to the activities you love without relying on endless appointments, injections, or surgery. If you are ready to move better and live without pain, book a discovery call with Spinal Haven and start your journey toward lasting recovery.
Frequently Asked Questions
Can you regain lost range of motion through physical therapy?
Yes, you can regain lost range of motion with a targeted approach. Physical therapy identifies why your movement is restricted, whether from tight tissue, joint stiffness, or poor motor control. A treatment plan that combines manual therapy with specific corrective exercises addresses the cause, not just the symptom. Most people notice measurable improvement within a few weeks of consistent work. The key is to match the exercise strategy to your specific movement dysfunction, which is why a functional movement assessment is often the first step.
How long does it take to retrain dysfunctional movement patterns?
Retraining movement patterns is a skill-building process, not a quick fix. Research on motor learning suggests that consistent, repeated practice is required for the central nervous system to adopt a new motor pattern. While some people feel a difference in days, lasting change typically takes 4 to 12 weeks of daily or near-daily practice. The timeline depends on how long the faulty pattern has been present, your consistency with the prescribed corrective exercises, and whether you are also addressing contributing factors like desk posture.
What is the difference between a functional movement assessment and a standard physical therapy evaluation?
A standard evaluation often focuses on strength, range of motion, and pain provocation in isolation. A functional movement assessment, like the Selective Functional Movement Assessment (SFMA), observes how you move through whole-body patterns like squatting, lunging, and reaching. This approach helps identify where compensations start along the kinetic chain. For example, a limitation in your ankle might cause your lower back to round during a squat. By finding the source of the breakdown, treatment targets the root cause rather than just the painful area.
Can corrective exercises for movement dysfunction prevent injuries?
Corrective exercises are a primary tool for injury prevention because they address the underlying movement dysfunctions that often lead to tissue strain. When you move with a faulty pattern, such as an unstable shoulder or a stiff hip, other joints compensate and take on excessive load. Over time, this overload causes pain. By restoring proper motor control, mobility, and stability through targeted exercises, you reduce the stress on vulnerable tissues. This makes daily activities and athletic performance safer and more efficient.